NVDA VOICEMEETER
--- Download Links ---
To view the full source code, click here - https://git.onyxandiris.online/onyx_online/nvda-voicemeeter

A Voicemeeter remote control app for visually impaired users. Designed to be used with the NVDA screen reader.
This application can be used entirely with the keyboard.
Requirements for use
Description
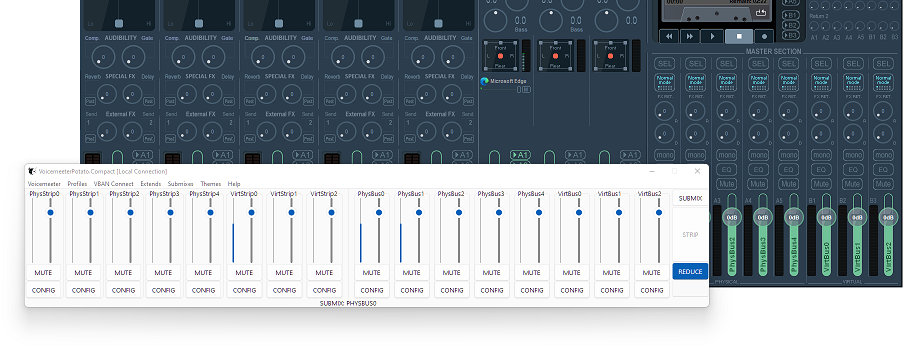
Voicemeeter is a virtual audio mixer allowing a user to mix both physical and software audio sources, configure advanced routing and much more! There are three versions, Basic, Banana and Potato, each offering their own features. Currently Voicemeeter is inaccessible for visually impaired users because it does not interact with screen readers and requires a mouse to control its features. That's why I decided to develop NVDA Voicemeeter, to bring accessibility to a software already used by millions of users worldwide. Both the main Voicemeeter application and NVDA Voicemeeter can be downloaded free of charge.
The NVDA Voicemeeter application aims to achieve the following goals:
- Read back all parameter updates caused by user input.
- Read back current parameter values when an element is focused.
- Accessible context menus for selecting hardware devices.
- Accessible sliders for controlling Gain, Compressor, Denoiser etc,
- Pop-up windows for renaming strips/buses.
- Save/Load user configurations from an accessible menu.
- and more!
How to Use
The following page describes the Potato version of NVDA Voicemeeter, however, all three versions are supported and available for download at the top of the page.
Click Here to jump to the list of Keyboard Commands and shortcuts to navigate the UI.
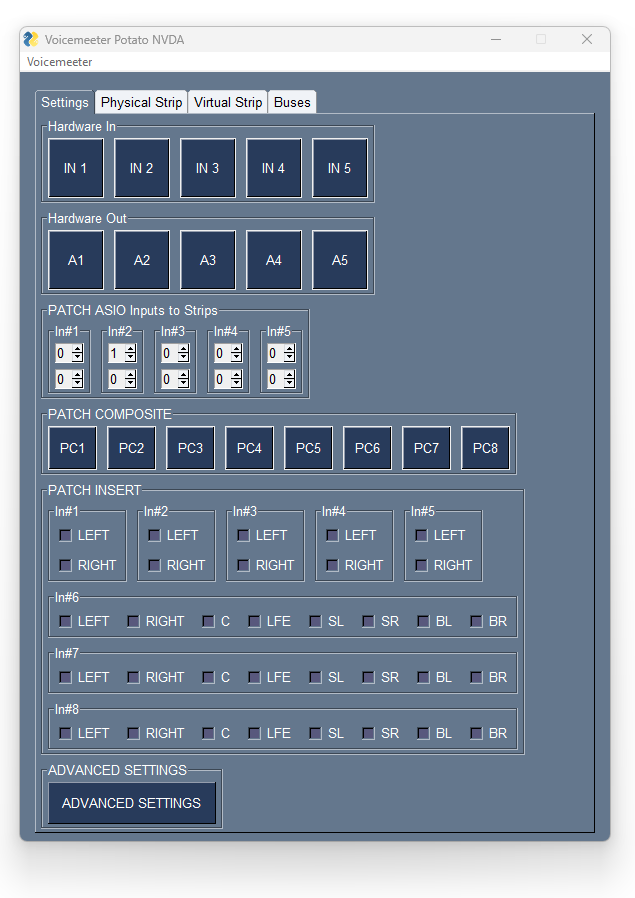
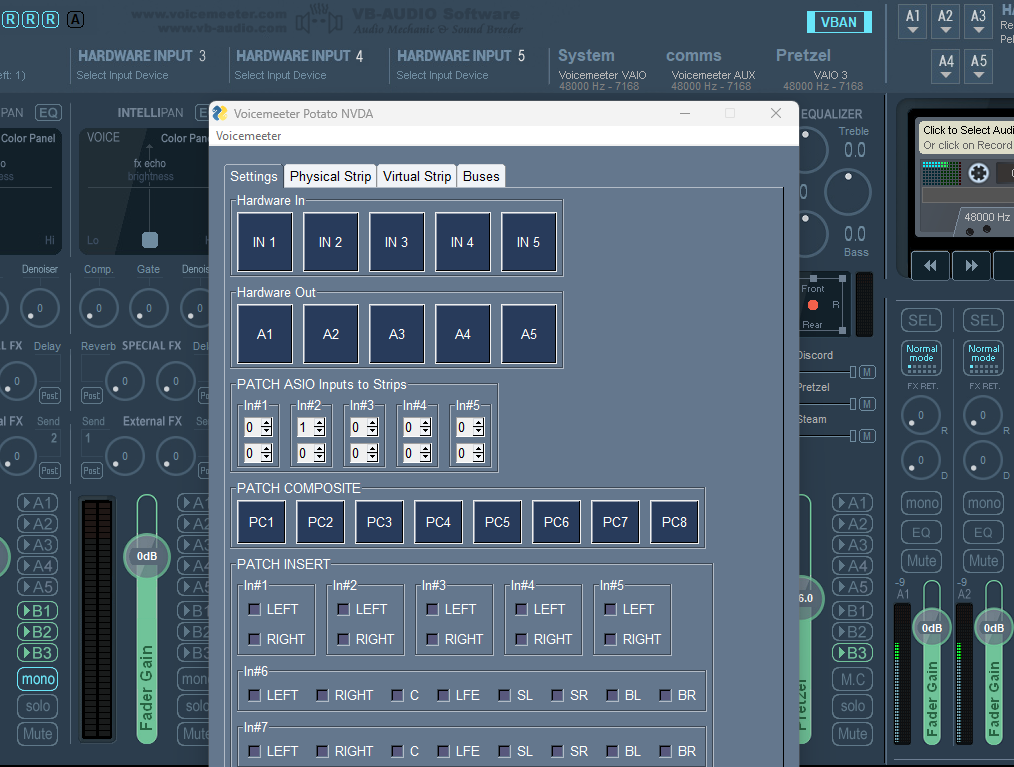
The program opens on the "Settings" tab. Displayed on this page are the following sections:
- Hardware In
- Hardware Out
- Patch ASIO Inputs to Strips
- Patch Composite
- Patch Insert
- Advanced Settings
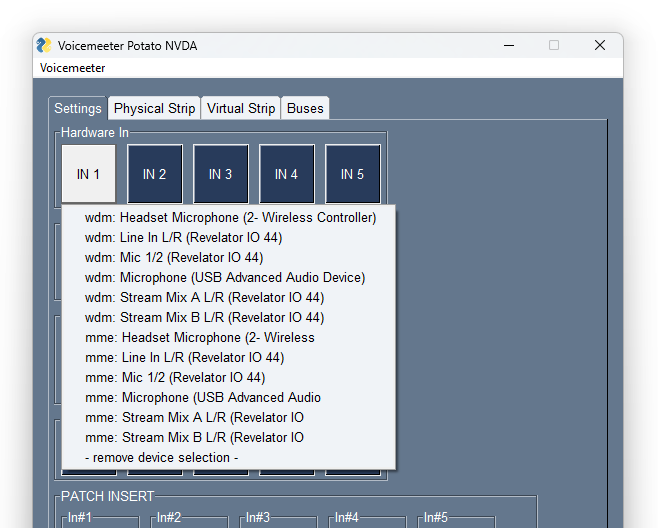
When selecting the Hardware Ins and Outs, a context menu will appear, giving all the available devices recognised by Windows. The screen reader will read back the current selection when an item in the list is focused. It will also read back a device selection.
Devices may be deslected using
- remove device selection -
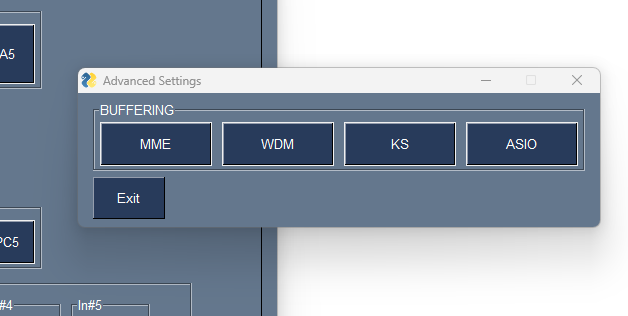
Selecting the "Advanced Settings" will open a pop-up window that allows you to finely tune the buffering options.
These are options available for those with specific expertise. In most circumstances default values will work correctly.
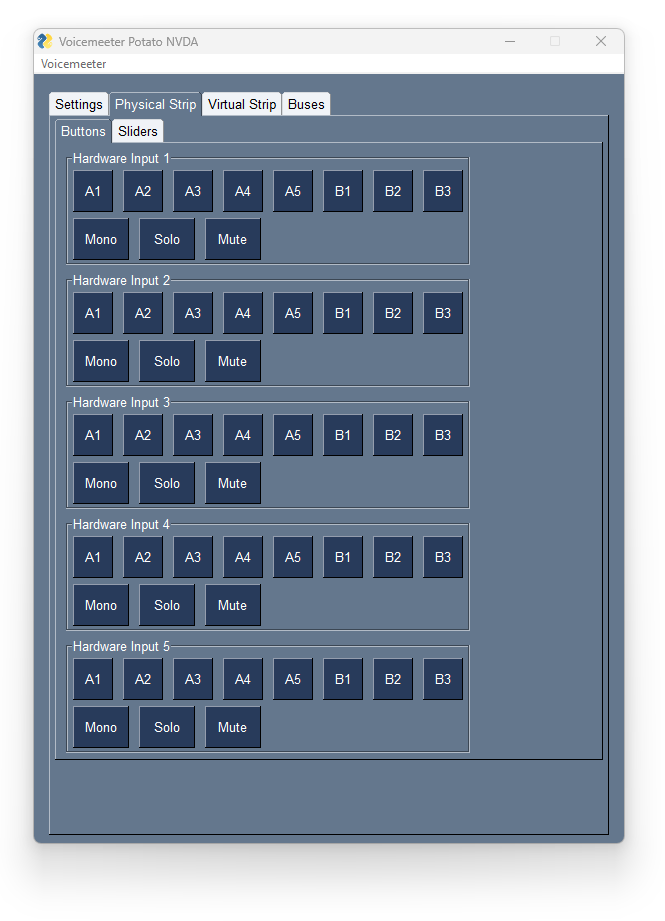
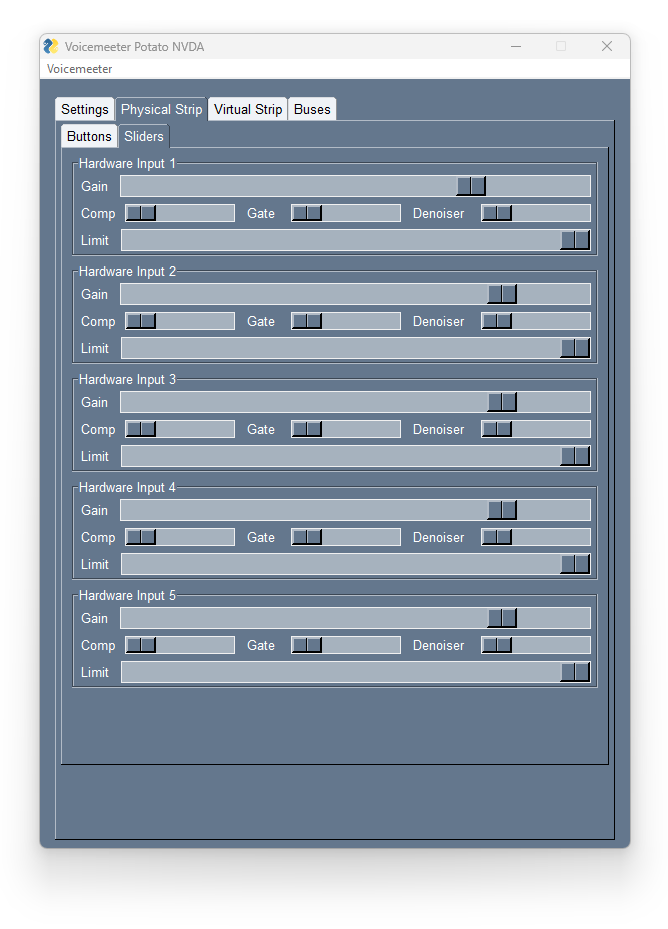
The other three tabs "Physical Strip", "Virtual Strip" and "Buses" each have two nested tabs, "Buttons" and "Sliders". For each nested tab you will find controls appropriate for the Voicemeeter type and channel type.
For example, if the version of Voicemeeter is "Basic", you will find buttons A1, B1 for the physical strips. Meanwhile, if the version of Voicemeeter is "Banana" you will instead find buttons A1-A3 and B1-B2.
These tabs can be navigated to directly, or you can use the Hotkeys (mentioned below) for quick configuration.

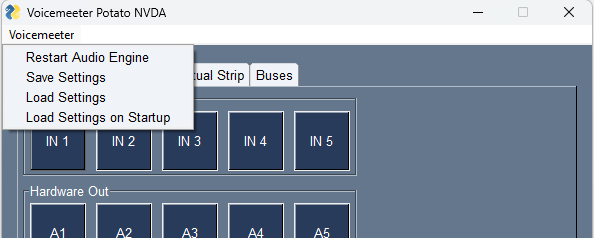
Once you're happy with the configurations, you can then save or load configs for future use. A single menu item "Voicemeeter" can be opened using Alt and then V.
The menu allows you to:
- Restart Voicemeeter audio engine
- Save/Load current settings (as an xml file)
- Set a config to load automatically on app startup.
The "Save Settings" option opens a pop-up window with two buttons, "Browse" and "Cancel". "Browse" opens a "Save As" dialog where you can save the config under a given name. "Cancel" closes the pop-up and returns to the main app window.
Shortcuts and Hotkeys
Please be aware that the shortcuts are dependent on the section you're currently navigated on.
Tabs
The app presents four tabs "Settings", "Physical Strip", "Virtual Strip" and "Buses". Navigate between the tabs with Control + TAB and Control + SHIFT + TAB. Once focused on any tab, Left and Right arrow keys can be used.
All controls within the tabs may be navigated between using TAB.
Settings
The following controls offer context menus accessed by pressing SPACE or ENTER:
- Hardware In
- Hardware Out
- Patch Composite
Press ESCAPE to exit any context menu.
All other buttons can be triggered by pressing SPACE or ENTER.
To adjust Patch Asio Inputs to Strips and Patch Insert values use UP and DOWN arrows when in focus.
To access Advanced Settings you may press the "Advanced Settings" button or use Control + A when in the "Settings" tab.
Strip/Bus
You will find in each of these tabs two nested tabs, "Buttons" and "Sliders". For each nested tab you will find the controls appropriate for the Voicemeeter kind and channel type.
All buttons may be triggered by pressing
SPACE
or
ENTER.
All sliders may be controlled in three different ways:
- Left arrow
or Right arrow to move a slider by 1 step.
- Shift + Left arrow or Shift + Right arrow to move a slider by 0.1 steps.
- Control + Left arrow or Control + Right arrow to move a slider by 3 steps.
To rename a strip/bus channel focus on the channel in question, then press F2. This will open a pop-up window where you can set the new channel name and press the OK button.
Pressing the
OK
button with an empty text input will clear the label. In this case the label will be read as a default value for that channel. For example, if the leftmost Strip label were cleared, the screen reader will now read "Hardware Input 1".
Pressing "Cancel" will close the pop-up window with no affect on the label.
Menu
The menu item "Voicemeeter" can be opened using Alt and then V. Then when in the menu, use UP and DOWN arrow keys.
Quick access binds
There are a number of quick binds available to assist with faster navigation and general use.
When focused on any one of "Physical Strip", "Virtual Strip" or "Buses" you may use Control + Number to skip to the corresponding channel.
When focused on any single channel (Strip or Bus), the following binds exist:
- Alt + Number
-
Control + O -
Control + S -
Control + M
will trigger the Bus output button corresponding to the number. For example Alt + 3 will trigger the "A3" button
will trigger the Mono button
will trigger the Solo button
will trigger the Mute button
You may also enter slider modes which allow for control of the channels sliders until the slider mode is exited. You may access the slider modes with the following binds:
-
Control + U -
Control + G -
Control + T -
Control + L -
Control + L - Control + I
- Control + R
will enter Audibility mode
will enter Gain mode
will enter Gate mode
will enter Limit mode
will enter Bass mode
will enter Mid mode
will enter Treble mode
To exit any of the slider modes press ESCAPE.
Once you are in a slider mode you may now control the slider that matches the slider mode. Slider mode binds are the same as the normal slider binds with the addition of the Alt keypress. For example, where you would normally use Right Arrow to shift a slider rightwards by 1 step, in slider mode you would now use Alt + Right Arrow.
Special Thanks
- Mario Loreti for his help in testing and offering feedback during development.
- NVAccess for creating the open source NVDA screen reader and its controller client.
- Vincent Burel for creating Voicemeeter and its SDK.
- PySimpleGUI team for creating an awesome GUI framework.
Additional Notes
- May not cover 100% of the Voicemeeter GUI, for example the many EQ parameters or recorder class.
- Only designed to work with the NVDA screen reader. Other screen readers not supported.
- Only the main Voicemeeter GUI supported by this application. No support for Matrix or other Voicemeeter products.
This little app makes my day job easier. I am a voice talent and I use it to route audio to and from my DAW.
Mario Loreti
Projects
NVDA Voicemeeter
A Voicemeeter remote application to assist visually impaired users to navigate and configure Voicemeeter with the NVDA screen reader.